Floorplan Editor
The Basics
Learn the fundamentals of using the Smart Home Floorplan editor.
Overview
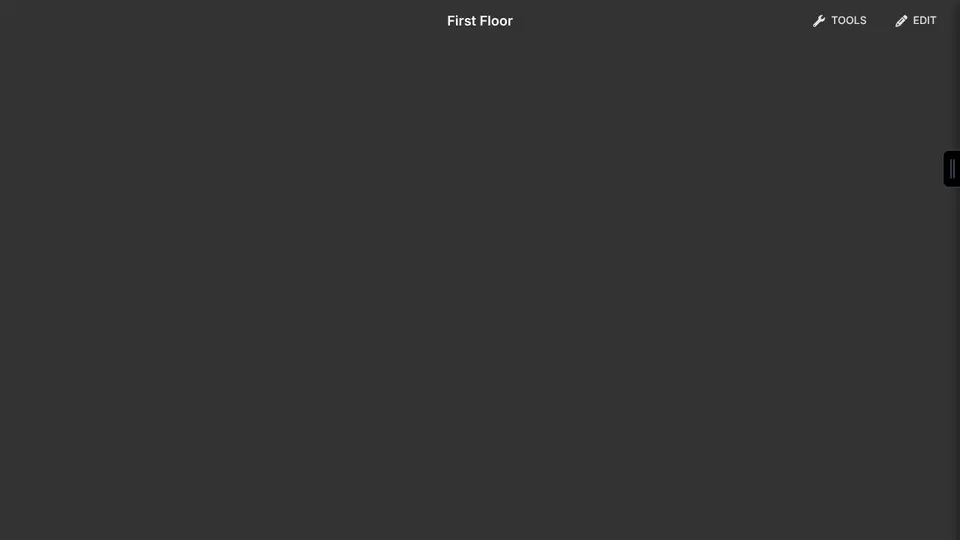
The image below shows an empty editor. This is what a new property looks like before any changes have been made. The editor has a couple major components:
- 1Layout area
Where you draw your layout.
- 2Floor name
In case you have multiple Floors.
- 3Tools button
Opens the side-panel with Help (keyboard shortcuts and help), Layouts (create and switch layouts), Floors (create and switch Floors), and Settings (adjust settings).
- 4Edit button
Changes into Edit Mode.
- 5Sidebar tab
Click to open, close or resize side-panel.
1. Layout area
2. Floor name
3. Tools button
4. Edit button
5. Sidebar tab
Edit Mode
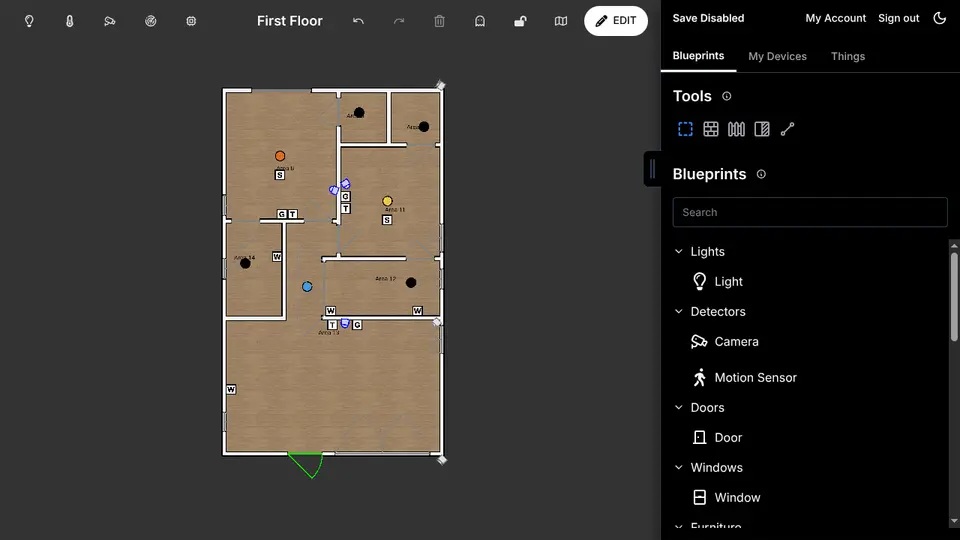
Click the Edit button to enter Edit Mode. The side-panel now has three tabs to help you draw and manage your layout.
Blueprints
The Blueprints tab contains Tools and Blueprints.
By default the Select tool is enabled. This allows you to click objects in the layout to select them, as well as draw selection rectangles to select multiple items.
The other tools allow you to draw walls, fences, room dividers, etc. To draw a wall, click the wall tool, then click in the layout where the wall should start from, move your mouse to the next location, click, and keep going until you are happy. At that point, click the right mouse-button or hit Escape to stop. Do it again to exit the tool.
Blueprints can be dragged into the layout to add them to the layout. You can later click them to change their properties.
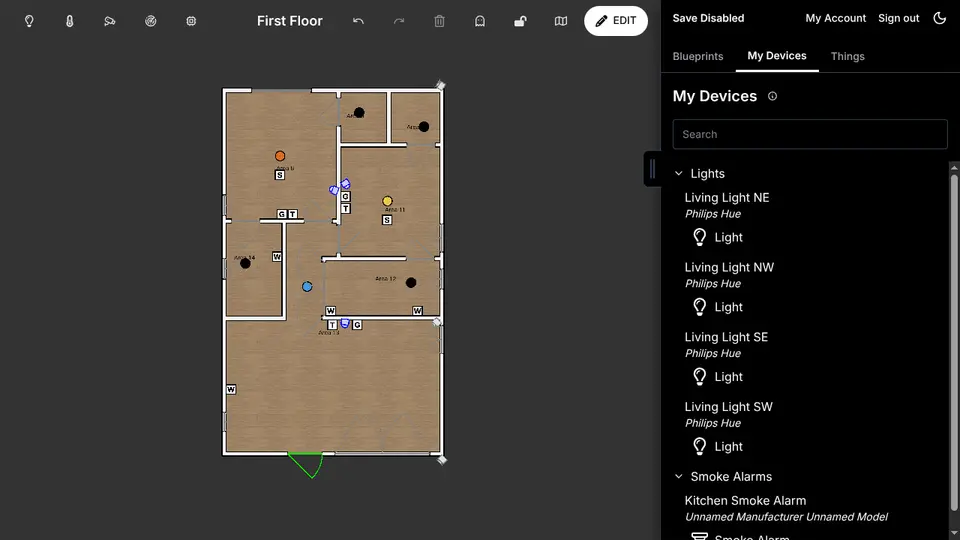
My Devices
The My Devices tab shows smart devices in your Home Assistant we have recognized that have not yet been added to the layout. These can be dragged into the layout in the same way as blueprints. These will stay connected to your Home Assistant device. If you e.g. pull in a light, it will match the state of your actual light, and you can turn it on/off by clicking it when not in edit-mode.
Things
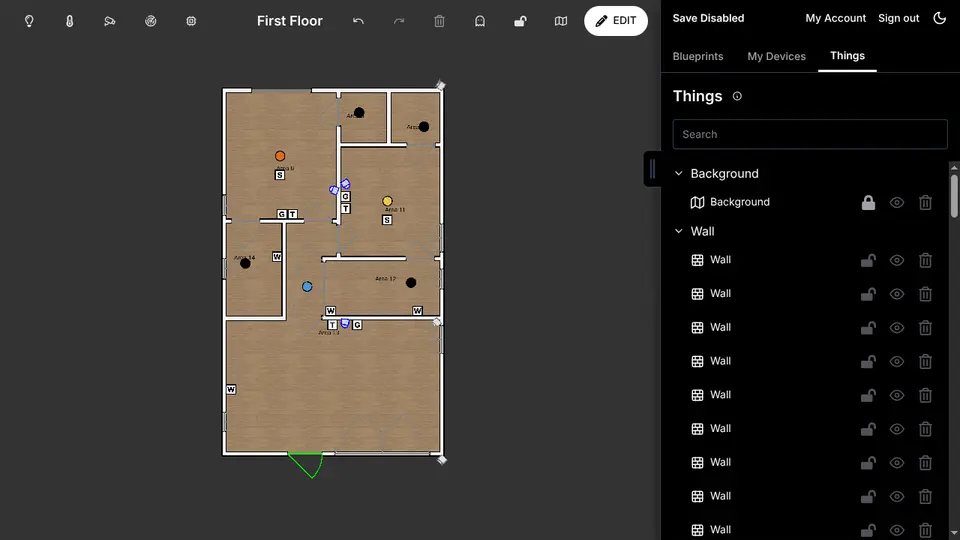
The Things tab contains objects you have already added to your layout. Click them to select. Also note the icons to the right of each object:
- Lock allows you to lock an item, preventing further editing
- Visibility allows you to hide an item. Useful for backgrounds when you are not using them
- Delete allows you to delete an item
Getting Around
Use these controls to move around the layout quickly:
On computer
- Pan by dragging: Click and drag with the middle mouse button.
- Pan by scrolling: Use mouse wheel or trackpad two-finger scroll to move the view.
- Zoom: Hold Ctrl (or Cmd on Mac) and scroll.
- Stop drawing tools: When drawing walls or similar tools, use right mouse button or Escape to stop drawing.
On tablet / phone
- Pan: Drag with two fingers.
- Zoom: Pinch with two fingers.
Drawing Your Layout:
Drawing your layout typically consists of these steps:
- 1Draw walls
Build out your floorplan.
- 2Place objects
Place doors, windows, lights, sensors and other objects.
When drawing walls, you can either free-hand it based on your own measurements of your home, or upload a reference floorplan and trace the walls.
Uploading A Reference Floorplan
- 1Add the Background blueprint
Go to Edit Mode, and drag the Background blueprint from the blueprints tab into the layout.
- 2Select Background in layout
Click the Background in the layout. The sidepanel now changes to show options for the background object.
- 3Upload the image
Click Upload Image to upload your background.
Note: The background is only visible in edit mode. If it disappears, go back into Edit Mode and it should show up.
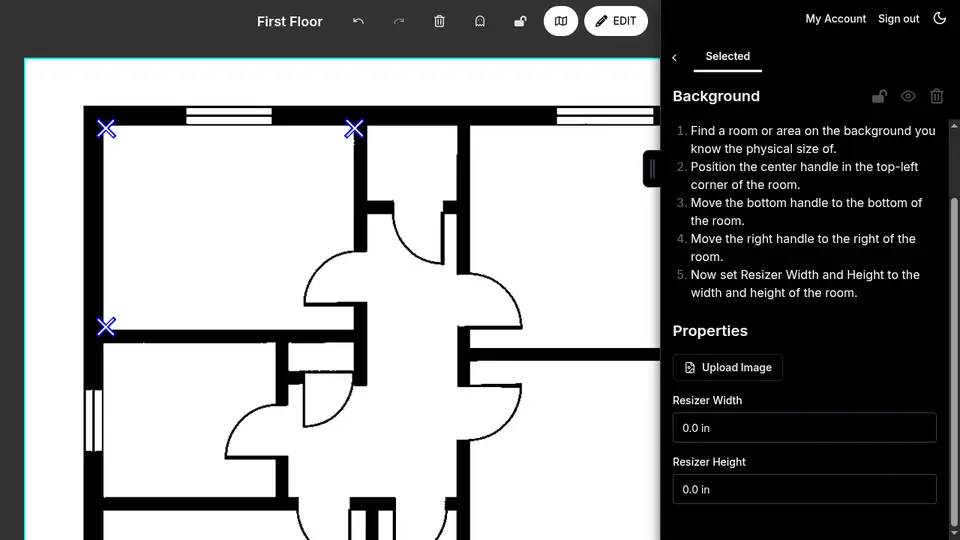
We now need to resize the background so its dimensions match that of the layout. In the picture below, note the blue crosses. We use these to mark an area in the floorplan we know the size of. Assume we know the size of the room in the picture below is 8ft x 6ft.
- 1Position the top-left cross
The top-left cross moves freely. Move it to the corner we want to measure from.
- 2Position right and bottom crosses
Move the right and bottom crosses out to mark the distances we want to measure from the top-left cross.
- 3Set Resizer Width
In the sidepanel, set Resizer Width to the actual distance between the top-left and top-right crosses, i.e. 8ft.
- 4Set Resizer Height
Set Resizer Height to the actual distance between the top-left and bottom-left crosses, i.e. 6ft.
The background will resize itself as you enter the measurements.
Other things to note:
- Once you are happy with your background, you can lock it in place by going to the Things tab and clicking the lock icon on it to prevent accidentally moving it. You can also click the visibility icon to hide it.
- You can also click the Toggle Background button right next to Edit to toggle visibility of all backgrounds
Drawing walls
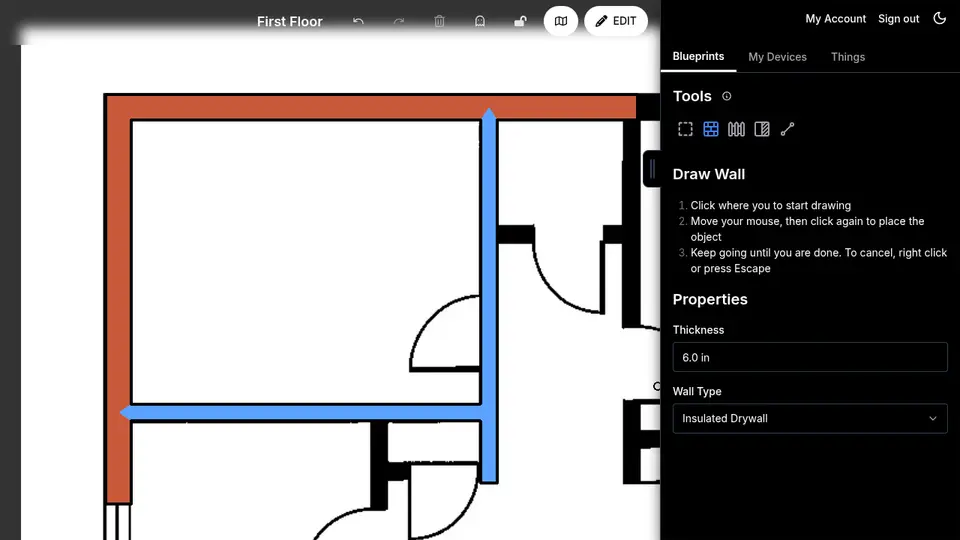
Once you have your background in place, do the following to draw your walls:
- 1Select Wall tool
Click the Wall tool in the Blueprints tab.
- 2Set wall options
When the wall tool is selected, set the desired thickness and wall type in the sidepanel.
- 3Draw walls
Click where you want the wall to start, then move your mouse to where the wall should end, and click again. Use the right mouse button or Escape to stop drawing.
Note:
- Start with the longest walls, then move on to shorter ones.
- You can start a wall from another wall. Your tool will snap to the right location when your cursor is close to another wall.
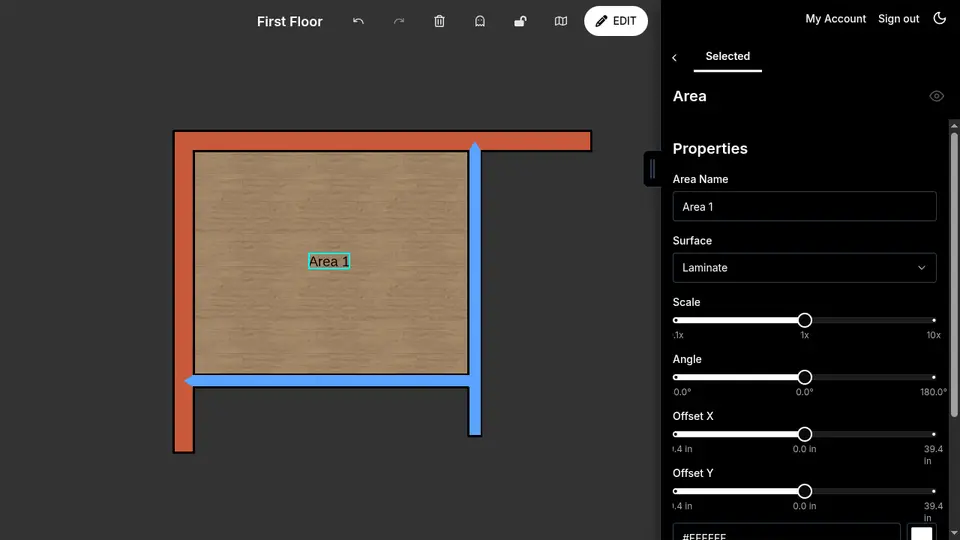
When you have enclosed a room, an area will show up, rendering a floor for your room. You can change the floor (surface) texture.
In Edit Mode, to see the area, click the Toggle Background button to hide the background. You can now click the area label to change the area name, surface texture, and other properties.
Placing objects
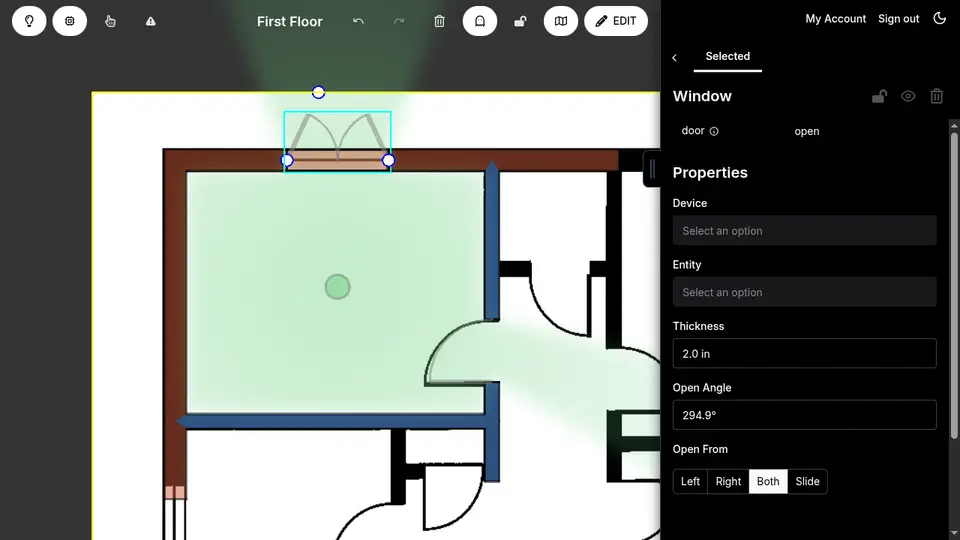
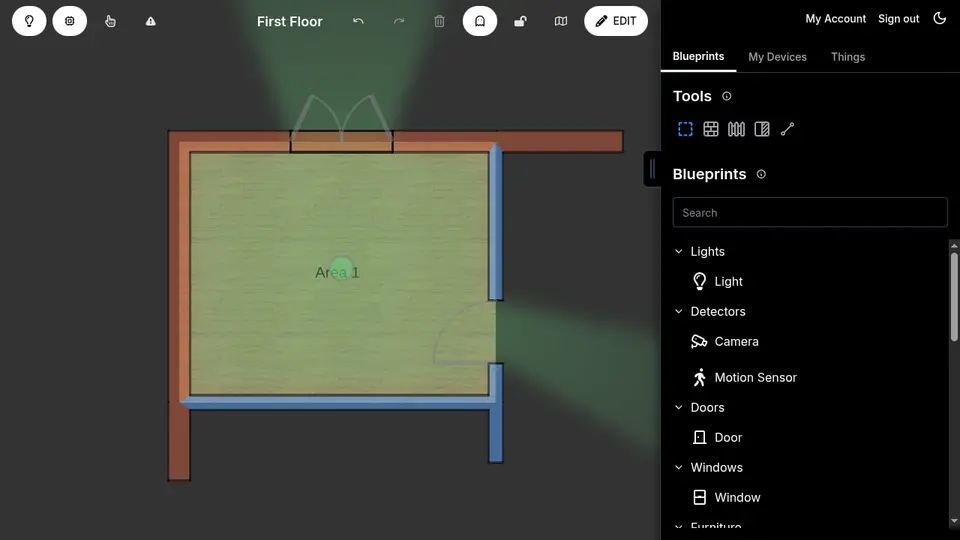
When placing doors and windows, you can enable Ghost Mode to see the background floorplan through the walls. Click the Ghost Mode button to the right of the Edit button to enable.
Objects can be placed both from the Blueprints tab or the My Devices tab by dragging them into the layout. Drag doors and windows on top of a wall to have them snap.
Most objects have properties that can be adjusted in the side-panel. Some, like walls, doors and windows also have grips that you can drag on to resize, shape or rotate them.
Multiple Layouts
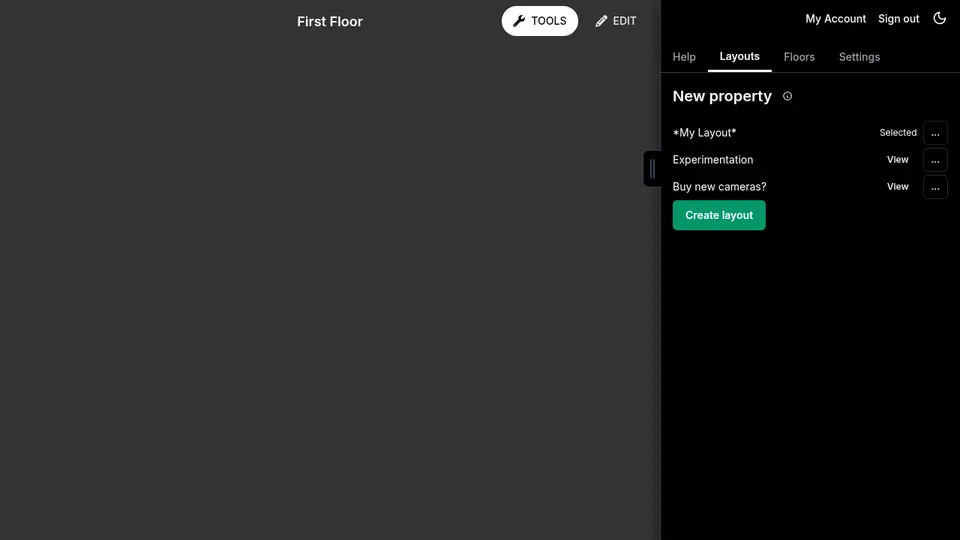
Go to the Layouts tab to see your layouts. By default you have one layout called My Layout. The layout saves all your objects. You can create additional layouts to experiment with things, or if you are planning out new additions to your home, such as buying new security cameras.
Multiple Floors
Go to the Floors tab to see your floors. By default you have one floor. Each layout can have multiple floors or levels.
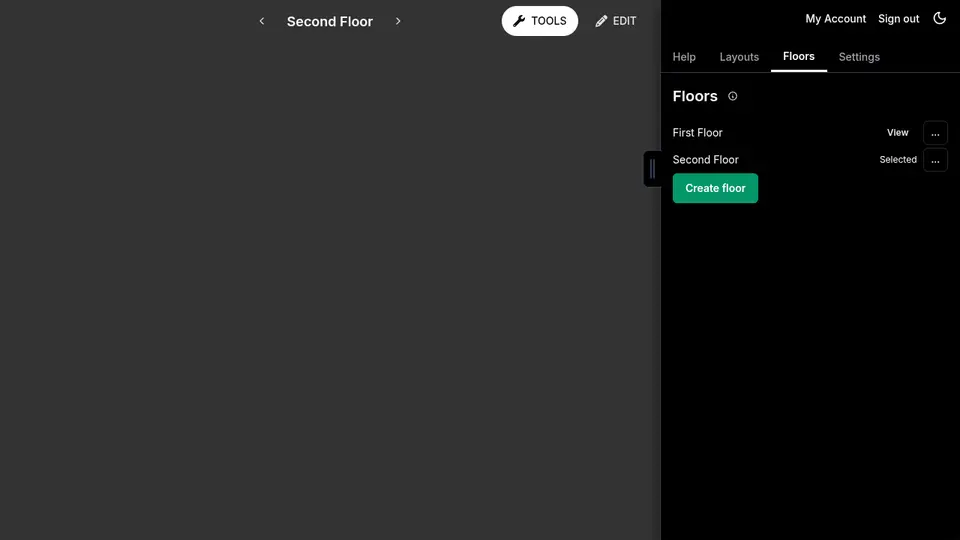
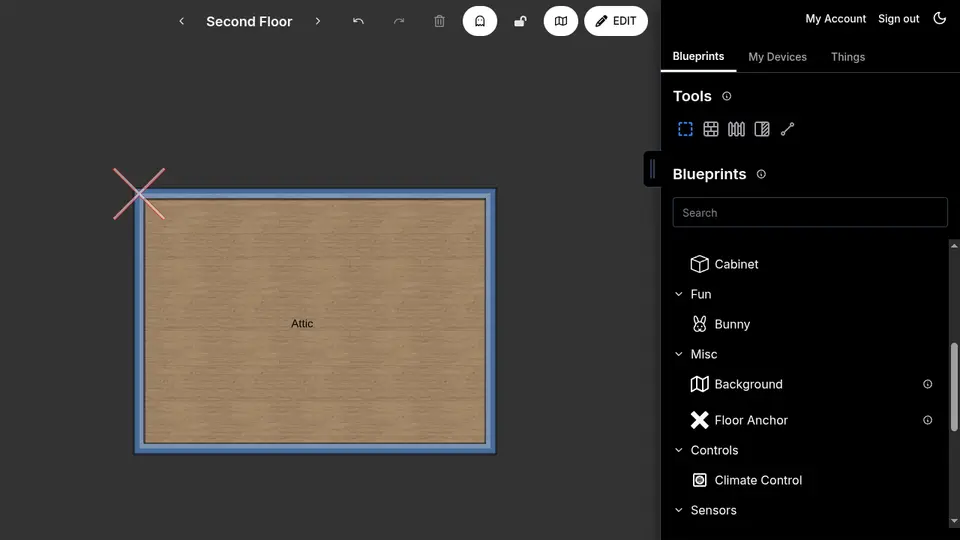
To align rooms across floors, use the floor anchor, and put it e.g. in the corner of a room that is present on both floors. The floor anchor shows on all floors, and allows you to make sure the rooms are set up in the right place relative to each other.