



Home Assistant
Install Home Assistant Add-on
This page will walk you through how to install the Smart Home Floorplan add-on on your Home Assistant instance. If you would rather not install an add-on, see Alternate Install.
Follow the steps on this page to install the add-on.
Retrieve propertyId and accessToken
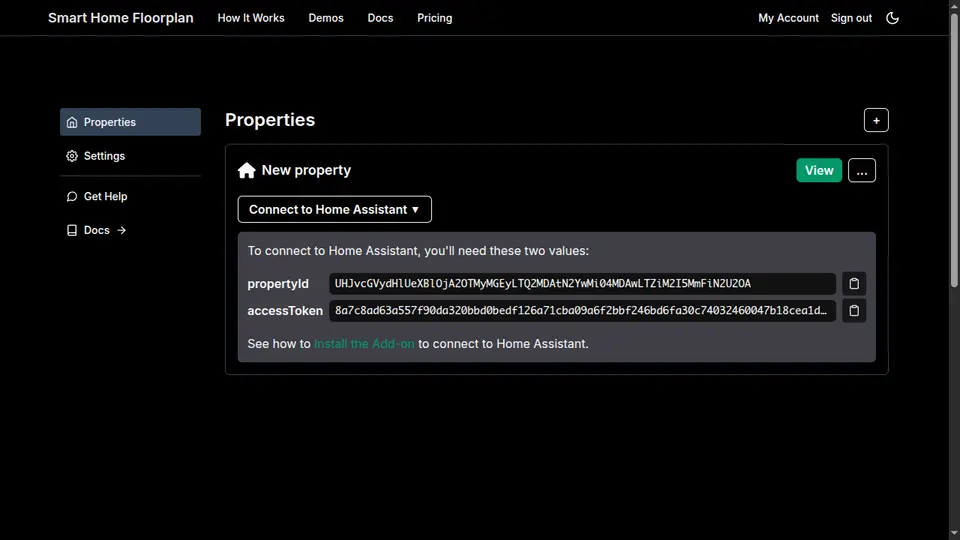
Each property has a unique propertyId, as well as an accessToken that will allow your Home Assistant instance to access the property
on your behalf. You can find both of these by going to Your Account, and clicking Connect to Home Assistant.
Install the Add-on
For this step we will install the following add-on repository and add-on. If you need help with the exact steps, you can find them below.
- Repository: https://github.com/loelabs-net/shf-ha-addons
- Add-on:
Smart Home Floorplan
Step by step instructions:
- 1Open Add-ons in Home Assistant
In Home Assistant, click
Settings, thenAdd-onsto get to the Add-ons screen. - 2Open the Add-on Store
Click
Add-on storein the bottom left. - 3Open repositories
In the top-right, click
⋮, and then selectRepositoriesin the drop-down menu. - 4Add the Smart Home Floorplan repository
In the popup window enter https://github.com/loelabs-net/shf-ha-addons, then click add.
- 5Install the add-on
Close the popup. You should now see the
Smart Home Floorplanadd-on. Install it.
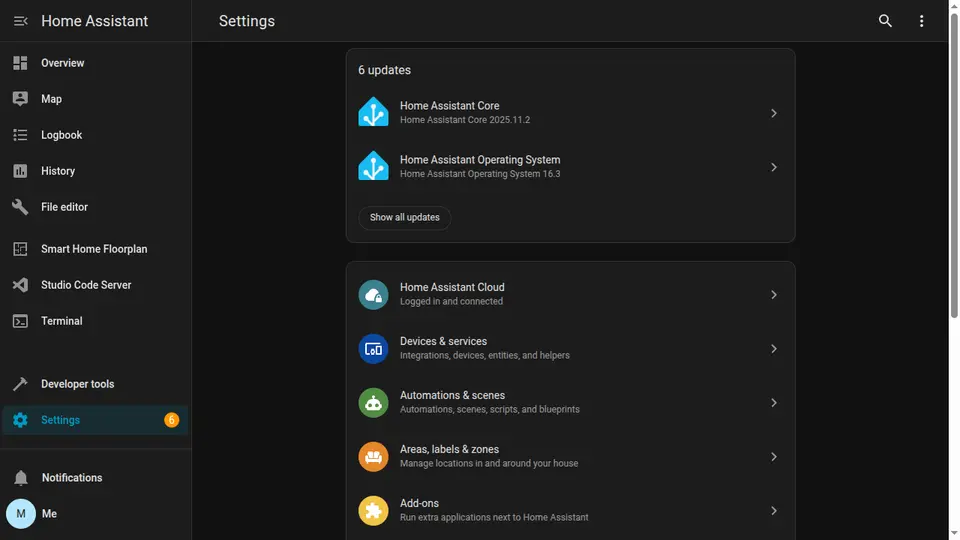
1: Click "Settings"
... then "Add-ons"
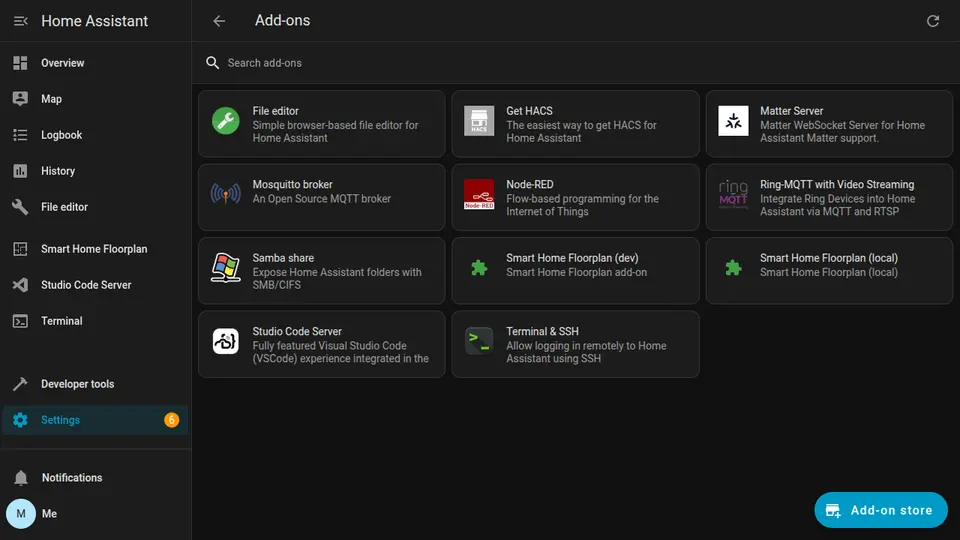
2: Click "Add-on Store"
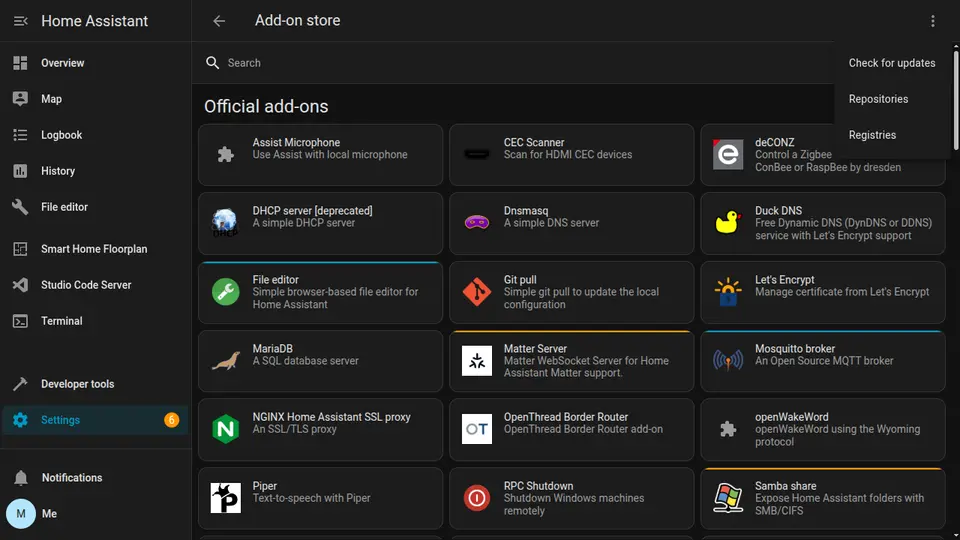
3: Click here
... then "Repositories"
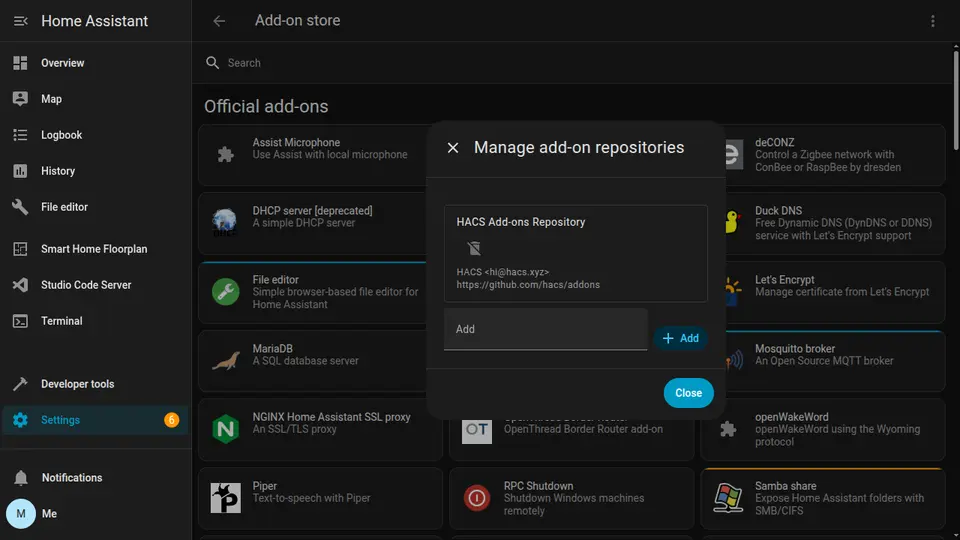
4: Add the repository here
... then click "+Add", then close
Configuration
- 1Open the installed add-on
Once installed, click into the add-on.
- 2Enable recommended Info settings
In the
Infopage, enableStart on boot,Autoupdate, andAdd to sidebar. - 3Set credentials in Configuration
In the
Configurationpage, add thepropertyIdandaccessTokenfrom step 1. - 4Start the add-on
Go back to the
Infopage and click Start.
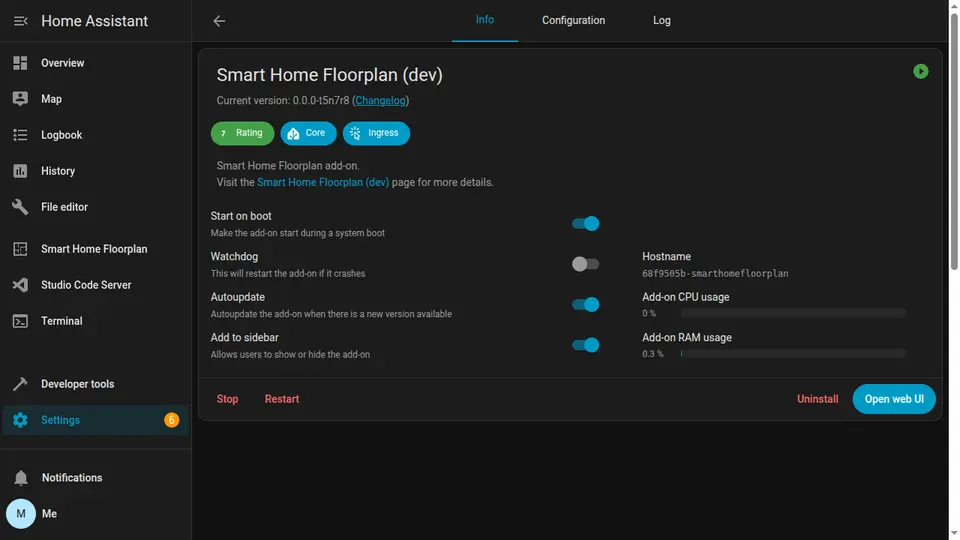
Match these settings
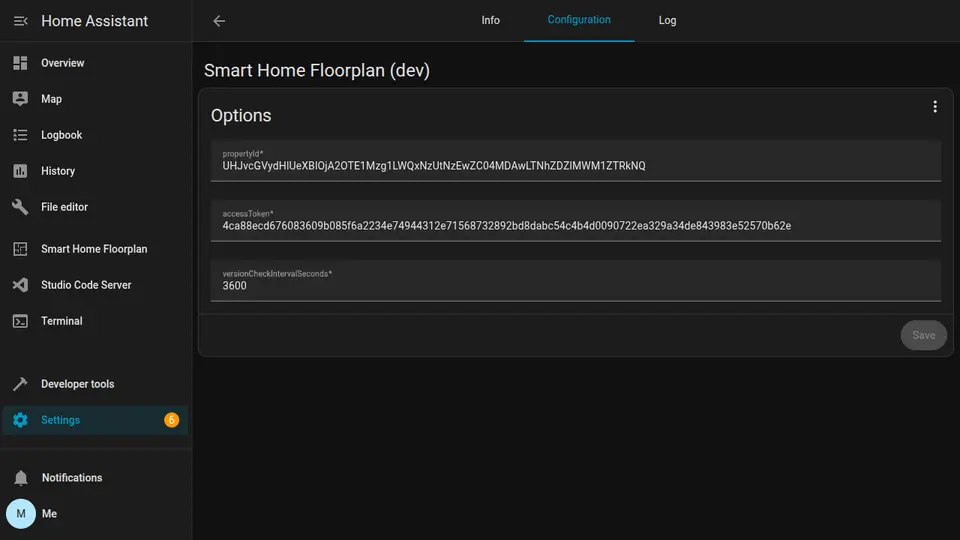
Update these
Start building
Click the Smart Home Floorplan in your side-nav. This will take you to the floorplan editor.
Note: This might not work if the add-on is still starting. If it fails, wait a couple minutes and try again.
Click to open Smart Home Floorplan
Troubleshooting
If you are having issues (or just want to hang out), join us on Discord